
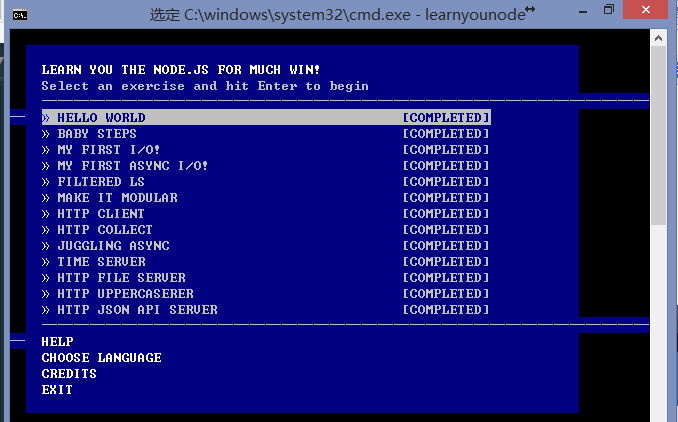
Learn You The Node.js For Much Win!
 After spending a few days of my spare time completing these
 Node.js introductory exercises, I’m going to organize the key concepts.
HELLO WORLD
Write a program that prints “HELLO WORLD” to the terminal (standard output stdout).
The best way to learn a language is to start by writing a Hello World program. This exercise is very simple; everyone can do it.
console.log("HELLO WORLD")BABY STEPS
Write a simple program that accepts one or more command-line arguments and prints their sum to the terminal (standard output stdout).
The accepted arguments can be accessed via process.argv, which is an array. The first two elements are fixed: the first is node, the second is the path to the file, and subsequent elements are the program’s input.
First, write a program with the following simple code to familiarize yourself:
console.log(process.argv)
Run our program by executing
node program.jsand adding a few arguments, for example:
$ node program.js 1 2 3
This will give you an array like this:
[ 'node', '/path/to/your/program.js', '1', '2', '3' ]
With this knowledge, writing the program becomes quite straightforward.
var result = 0;
process.argv.forEach(function(el,index){
	if (index>1) {
		result += +el;
	}
});
console.log(result);
MY FIRST I/O!
Write a program that performs a synchronous file system operation, reads a file, and prints the number of lines in that file to the terminal (standard output stdout). This is similar to executing the command
cat file | wc -l.
The full path to the file to be read will be provided as the first command-line argument.
First, to operate on a file, we need to use the fs module. We can import it with var fs = require('fs');. Then, we can access the entire fs module through the fs variable.
In
fs, all synchronous (or blocking) file system operation method names end with ‘Sync’. To read a file, you will need to use thefs.readFileSync('/path/to/file')method. This method returns aBufferobject containing the file’s entire content. ABufferobject is how Node efficiently handles data, whether it’s ASCII, binary, or other formats. ABuffercan be easily converted to a string by calling itstoString()method, e.g.,var str = buf.toString().
So, what we need to do is first import the fs module, then read the input data. Our goal is to count the number of lines. We know that each line ends with a \n character, so we just need to count the number of \n characters.
var fs = require('fs');
var data = fs.readFileSync(process.argv[2]);
var str = data.toString();
var array = str.split('\n');
console.log(array.length-1);
MY FIRST ASYNC I/O!
Write a program that performs an asynchronous file system operation: reads a file and prints the number of lines in that file to the terminal (standard output stdout). This is similar to executing the command
cat file | wc -l.
The full path to the file to be read will be provided as the first command-line argument.
This problem is almost identical to the previous one, except it involves asynchronous reading. For this, we’ll need to use fs.readFile() instead of fs.readFileSync().
Remember, Node.js callback functions typically have the following signature:
function callback (err, data) { /* ... */ }. So, you can check the truthiness of the first argument to determine if an error occurred. If no error occurs, you will receive aBufferobject in the second argument. Similar toreadFileSync(), you can pass'utf8'as its second argument and the callback function as the third argument; this way, you will receive a string instead of aBuffer.
var fs = require('fs');
var data = fs.readFile(process.argv[2],function(err,data){
    if(err){
        throw console.error(err);
    }
    var list = data.toString().split('\n');
    console.log(list.length-1);
});
FILTERED LS
Write a program that prints a list of files in a given directory, filtered by a specific file extension. This time, two arguments will be provided: the first is the directory path (e.g.,
path/to/dir), and the second is the file extension to filter by.
For example: if the second argument is
txt, you need to filter for files with the.txtextension.
Note that the second argument will not have a leading
..
You need to print the filtered list to the terminal, one file per line. Additionally, you must use asynchronous I/O operations.
This is also quite simple: split the filename by . into two parts; the latter part is the extension.
var fs = require('fs');
var path = process.argv[2];
var extname = process.argv[3];

fs.readdir(path,function(err,list){
    if(err){
        throw err;
    }else{
        list.forEach(function(file){
            if(file.split('.')[1] === extname){
                console.log(file);
            }
        });
    }
});
MAKE IT MODULAR
This problem is similar to the previous one, but this time it introduces the concept of modules. You will need to create two files to solve this problem.
Write a program that prints a list of files in a given directory, filtered by a specific file extension. This time, two arguments will be provided: the first is the directory to list, and the second is the file extension to filter by. You need to print the filtered list to the terminal (one file per line). Additionally, you must use asynchronous I/O.
You must write a module file to do most of the work. This module must export a single function that takes three arguments: the directory name, the file extension, and a callback function, in that order. The file extension must be exactly the same string as passed to your program. That is, do not turn it into a regular expression or add a
.prefix or do any other processing; pass it directly to your module, where you can process it to make your filter work correctly.
The callback function must be called using the idiomatic Node.js convention
(err, data). This convention dictates that unless an error occurred, the first argument passed to the callback will benull, and the second argument will be your data. In this problem, the data will be your filtered list of files, in the form of an array. If you receive an error, such as fromfs.readdir(), you must pass this error as the first and only argument to the callback function and execute the callback.
You must absolutely not print the results directly to the terminal within your module file; you can only write the code to print the results in your main program file.
When your program receives errors, simply catch them and print the relevant information to the terminal.
Here are four rules your module must adhere to:
- Export a function that accurately accepts the arguments mentioned above.
- Accurately call the callback function when an error occurs or when data is available.
- Do not modify anything else, such as global variables or stdout.
- Handle all possible errors and pass them to the callback function.
The benefit of following conventions is that your module can be used by anyone else who also adheres to these conventions. Therefore, the module you create here can be used by other learnyounode learners or for validation, and it will work perfectly.
First, our module file can be adapted from the previous problem and named program-6-require.js. Its task is to return an array of filtered filenames.
var fs = require('fs');
module.exports = function(path, extname, callback) {
    fs.readdir(path, function(err, list) {
        if (err) {
            return callback(err, null);
        } else {
            list = list.filter(function(file) {
                return file.split('.')[1] === extname;
            });
        }
        callback(null, list);
    });
};
Then, in the main program file, call this module and print the contents of the array returned by the module.
var mymodule = require('./program-6-require');
var path = process.argv[2];
var extname = process.argv[3];

mymodule(path,extname,function(err,files){
    if(err){
        return console.log(err);
    }
    files.forEach(function(file){
        console.log(file);
    });
});
HTTP CLIENT
Write a program that makes an HTTP GET request to the URL provided as the first command-line argument. Then, for each “data” event, print the received data as a string on a new line to the terminal (standard output stdout).
To complete this exercise, you will need to use one of Node.js’s core modules:
http.
The
http.get()method is a shortcut for making simple GET requests, and using it can simplify your program to some extent. The first argument tohttp.get()is the URL you want to GET, and the second argument is the callback function.
Unlike other callback functions, this one has the following signature:
function callback (response) { /* ... */ }
The
responseobject is a Node Stream object. You can think of a Node Stream as an object that emits events. The three events we usually care about are:"data","error", and"end". You can listen for an event like this:
response.on("data", function (data) { /* ... */ })
The
'data'event is emitted when each chunk of data arrives and is ready for processing. The size of the data chunk will depend on the data source.
The
responseobject/Stream you get fromhttp.get()also has asetEncoding()method. If you call this method and specify'utf8'as its argument, then thedataevent will pass strings instead of standard NodeBufferobjects, so you won’t need to manually convertBufferobjects to strings.
With the hints above, implementation is quite easy.
var http = require('http');

http.get(process.argv[2],function(response){
    response.setEncoding('utf8');
    response.on("data",function(data){
        console.log(data);
    });
    response.on("error",function(err){
        throw err;
    });
    response.on("end",function(){
        // console.log(date);
    });
});
HTTP COLLECT
Write a program that makes an HTTP GET request to the URL provided as the first command-line argument. Collect all data returned by the server (not just from “data” events) and then print it to the terminal (standard output stdout) on two lines.
The first line you print should be an integer representing the length of the string content you received, and the second line should be the complete string result returned by the server.
What we need to do is collect all the data first, and then concatenate it after the request ends.
var http = require('http');
var url = process.argv[2];

http.get(url,function(response){
    var list = [];
    // response.setEncoding('utf8');
    response.on("data",function(data){
        list.push(data.toString());
    });
    response.on("error",function(err){
        throw err;
    });
    response.on("end",function(){
        var str = '';
        list.forEach(function(s){
            str += s;
        });
        console.log(str.length);
        console.log(str);
    });
});
JUGGLING ASYNC
This problem is very similar to the previous one (HTTP Collector), also requiring the use of the
http.get()method. However, this time, three URLs will be provided as the first three command-line arguments.
You need to collect the complete content returned by each URL and then print it to the terminal (standard output stdout). This time, you don’t need to print the length of the content, just the content itself (as a string); the content corresponding to each URL should be on a new line. The key is that you must print the content in the order of the URLs as they appear in the argument list for it to be considered complete.
Here are a few considerations:
1 Collect the complete content returned by each URL
2 Determine if all requests have completed
3 Print the obtained content in the order of the URLs
First Problem
This is simple, just like the previous problem.
Second Problem
To determine if all requests have completed, we need a list to store their statuses. If a request is complete, we mark it.
Third Problem
To print the content in URL order, we need to record the index when saving the data, and then print it according to that index.
var http = require('http');
var urls = process.argv.slice(2,process.argv.length);
var datas = [];
var end = [];
var is = false;
urls.forEach(function(url,index){
    http.get(url,function(response){
        var list = [];
        response.setEncoding('utf8');
        response.on("data",function(data){
            list.push(data);
        });
        response.on("error",function(err){
            throw err;
        });
        response.on("end",function(){
            var str = '';
            list.forEach(function(s){
                str += s;
            });
            datas[index] = str;
            end.push(true);
            if (isEnd()) {
                for (var i = 0; i < datas.length; i++) {
                    console.log(datas[i]);
                }
            }
        });
    });

});
function isEnd(){
    if (end.length === urls.length) {
        end.forEach(function(blo){
            if(blo){
                is = true;
            }else{
                is = false;
            }
        });
    }
    return is;
}
My approach to this problem is a bit verbose. Below is the official solution for reference.
var http = require('http')
var bl = require('bl')
var results = []
var count = 0

function printResults () {
  for (var i = 0; i < 3; i++)
    console.log(results[i])
}

function httpGet (index) {
  http.get(process.argv[2 + index], function (response) {
    response.pipe(bl(function (err, data) {
      if (err)
        return console.error(err)

      results[index] = data.toString()
      count++

      if (count == 3)
        printResults()
    }))
  })
}

for (var i = 0; i < 3; i++)
  httpGet(i)
TIME SERVER
Write a TCP Time Server
Your server should listen on a port for TCP connections. This port will be passed to your program as the first command-line argument. For each TCP connection, you must write the current date and time in 24-hour format, as follows:
“YYYY-MM-DD hh
”
followed by a newline character.
Month, day, hour, and minute must be zero-padded to two digits:
“2013-07-06 17<42>”
Official hints:
In this exercise, we will create a TCP server. No HTTP-related matters will be involved, so we only need to use the
netNode core module. It contains all basic networking functionalities.
The
netmodule has a method callednet.createServer(), which accepts a callback function. Unlike other Node callback functions, the callback used bycreateServer()will be called multiple times. Your server will call this callback function once for each TCP connection it receives. This callback function has the following signature:
function callback (socket) { /* ... */ }
net.createServer()also returns an instance of a TCP server, and you must callserver.listen(portNumber)to make your server start listening on a specific port.
A typical Node TCP server will look like this:
var net = require('net')
var server = net.createServer(function (socket) {
// socket handling logic
})
server.listen(8000)
Remember to listen on the port specified by the first command-line argument.
The
socketobject contains a lot of meta-data about each connection, but it is also a Node duplex Stream, meaning it can both read and write. For this exercise, we only need to write data to the socket and close it.
You can write data to the socket using
socket.write(data), and close a socket usingsocket.end(). Additionally, the.end()method can also accept a data object as an argument, so you can simply usesocket.end(data)to perform both writing data and closing the socket.
With the official hints, everything becomes straightforward.
var net = require('net');

var port = process.argv[2];
var getTime = function(){
    var date = new Date(),
        year = date.getFullYear(),
        month = formate(date.getMonth()+1),
        day = formate(date.getDate()),
        hour = formate(date.getHours()),
        minute = formate(date.getMinutes());
    var time = year + "-"+month+"-"+day+" "+hour+":"+minute;
    function formate(time){
        return (time.toString().length>1?'':'0')+time;
    }
    return time;
};

var server = net.createServer(function(socket){
    socket.write(getTime()+'\n');
    socket.end();
});
server.listen(port);
HTTP FILE SERVER
Write an HTTP file server that serves the requested file to the client for each request.
Your server needs to listen on the port specified by the first command-line argument provided to you.
Additionally, the second argument provided to your program will be the location of the text file to be served. In this problem, you must use the
fs.createReadStream()method to respond to requests in a stream-like fashion.
Here, we need to use http.createServer() from the http module. Similar to net, the difference is that it communicates using the HTTP protocol. Also, there’s the fs method below.
The
fscore module also contains stream-based APIs for handling files. You can use thefs.createReadStream()method to create a stream for the file specified by a command-line argument. This method returns a stream object, which can use syntax likesrc.pipe(dst)to pipe data from thesrcstream to thedststream. In this way, you can easily connect a file system stream with an HTTP response stream.
var fs = require('fs'),
    http = require('http');

var port = process.argv[2],
    path = process.argv[3];

var fileStream = fs.createReadStream(path);

var server = http.createServer(function(req,res){
    res.writeHead(200,{'content-type':'text/plain'});
    fileStream.pipe(res);
});

server.listen(port);
HTTP UPPERCASERER
Write an HTTP server that only accepts POST requests and converts the characters in the POST request body to uppercase, then returns them to the client.
Your server needs to listen on the port specified by the first command-line argument.
Here, you just need to know the toUpperCase() method.
var http = require('http');
var port = process.argv[2];

var server = http.createServer(function(req,res){
    var post = '';

    // console.log(req.method);
    if (req.method !== "POST") {
        return res.end("The method must be POST");
    }
    res.writeHead(200,{'content-type':'text/plain'});

    req.on('data',function(data){
        post += data;
    });

    req.on('end',function(){
        res.end(post.toString().toUpperCase());
    });

});

server.listen(port);
HTTP JSON API SERVER
Write an HTTP server that responds with JSON data whenever it receives a GET request to the path
/api/parsetime. We expect the request to include a query parameter with the key"iso"and an ISO-formatted time value.
E.g.:
/api/parsetime?iso=2013-08-10T12:10:15.474Z
The JSON response should contain only three properties:
'hour','minute', and'second'. For example:
{
      	"hour": 14,
      	"minute": 23,
      	"second": 15
    }
Then, add another endpoint at path
/api/unixtime, which can receive the same query parameter, but its response will contain a single property:'unixtime', with a UNIX timestamp as its value. For example:
{ "unixtime": 1376136615474 }
Your server needs to listen on the port specified by the first command-line argument.
First, we need two methods to convert the time into the respective JSON formats. Then, we need to use the url module to parse the request.
var http = require('http'),
    url = require('url');

var port = process.argv[2];

var parseTime = function(time){
    return{
        "hour": time.getHours(),
        "minute": time.getMinutes(),
        "second": time.getSeconds()
    };
};
var getUnixTime = function(time){
    return{
        "unixtime": time.getTime()
    };
};

var server = http.createServer(function(req,res){
    // console.log(url.parse(req.url,true));
    var queryString = url.parse(req.url,true).query,
        time = new Date(queryString.iso),
        pathname = url.parse(req.url,true).pathname,
        result;
    if (req.method != "GET") {
        res.end('Method must be GET');
    }
    if (pathname === '/api/parsetime') {
        result  = parseTime(time);
    }else if(pathname ===  '/api/unixtime'){
        result = getUnixTime(time);
    }

    if (result) {
        res.writeHead(200,{'Content-Type':'application/json'});
        res.end(JSON.stringify(result));
    }else{
        res.writeHead(404);
        res.end('404,not found');
    }
});

server.listen(Number(port));
Finally
As this is my first time encountering these problems, there might be issues with the code. Feel free to discuss with me; let’s learn from each other.
All the code above is integrated and available here;